Various options for fixing decaying rubber electronics

This was initially part of my An Ode to Netbooks post, but it didn't quite flow, and I felt it was an interesting topic in its own right, so I decided to expand on it here.
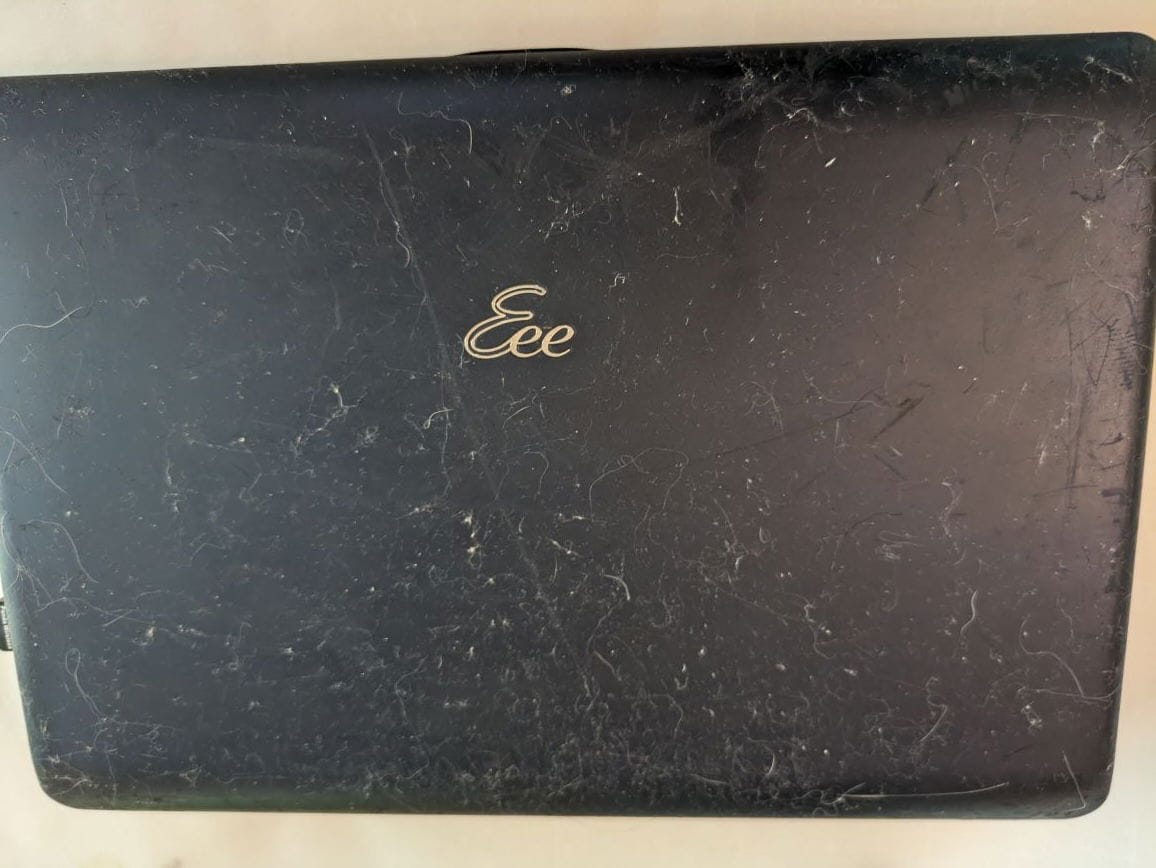
This year I decided to address a looming problem that had gotten impossible to ignore. Have you ever had an old rubber coated TV remote or game controller that got gooey and tacky, and it seemed impossible to fix? My favorite little netbook had come down with this disease, and I couldn't stand it. Something about that degraded rubber is the worst texture, and in the netbook's case it was also like a nasty lint roller.

A brief internet search revealed this is a fairly widespread problem with grippy electronics, and I felt like there should be some kind of solution to it. I ended up trying nearly all of them (except I believe baking soda).
I had suspicions that the end result of baking soda would not be great.
Solution #1: Solvents et al.
I initially saw various suggestions of applying solvents and patiently scrubbing enough layers off to restore a stable layer, or perhaps sacrifice all of it and reveal the normal plastic underneath. It did not work for me on the Eee PC, but I think this could work in some situations, like with a game controller or an older Thinkpad.
The problem with the Eee PC was it looks like it's entirely that awful rubber right down to whatever the base case is made of, so that was not viable. Some suggested that the sometimes the outer rubber degrades faster than the rubber underneath, so if you remove enough you may find a stable layer. In my case it was wishful thinking that there would be such a layer - I am fairly sure it's goo all the way down. If you scrap the lid with your nail it's like scraping a sticky crayon.
It general it would look OK after a pass with the solvents, until the first thing stuck to it again. In short, if the coating appears to be fairly thin, aim to remove all of it with solvents.
You do need to do this step regardless before you move on to the other options.
Microfiber cloths vs. Cotton
I tried a microfiber cloth initially, but found they shed too much. I did however have decent results with these cotton bar towels, just be willing to sacrifice them to the cause. They have the right amount of abrasive texture without leaving anything behind.
Acetone
Acetone worked alright, fumes aside. I think 70% rubbing alcohol worked better, but it may depend on the particular substrate you're attacking. It's worth trying though.
Goo Gone
In my case I think the Goo Gone made things worse. I would avoid.
- Reason #1: It looked like it softened the rubber coating, but not enough to remove it, so one could argue it made it worse.
- Reason #2: Being an oily substance, you're now stuck trying to remove that now.
Upside, it smells much better than acetone.
70% Rubbing Alcohol
I think this one is the most reliable. The trickiest part is you want to get just enough on the surface to not make a mess, and work in circles with a small part of the towel. It takes some practice.
Solution #2: Plasti Dip
I was not aware of this until this project, but people spray temporary designs onto their cars with this synthetic rubber coating called Plasti Dip. I figured that since it is theoretically reversible (see below) and peels off easily that this could be worth trying. It's also available as a spray paint, which is what we will be using. I think this would be the best choice for complicated shapes, just mask it off first after an initial cleaning with your solvent of choice above.
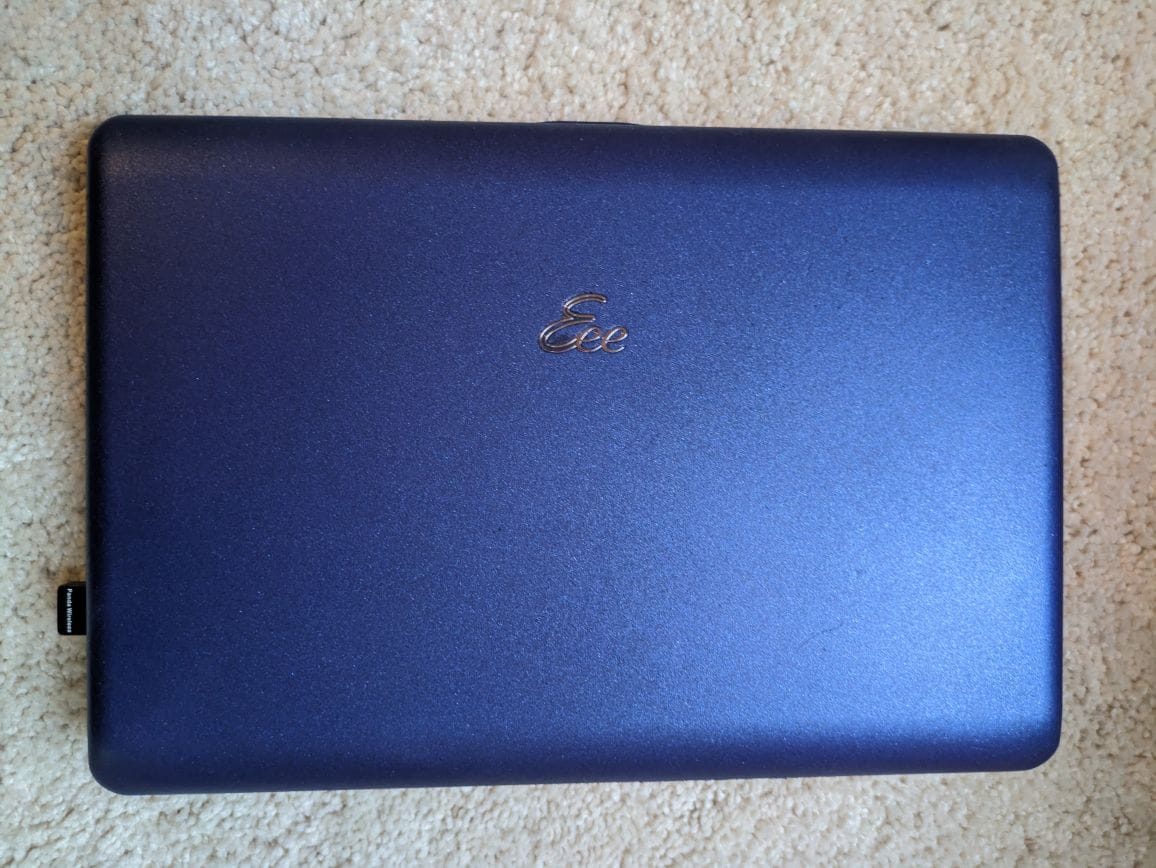
The local Autozone had a delightfully metallic blue can, and I set to work. I think it turned out shockingly better than expected, and I even scraped out the Eeeeeee so it would proudly shine through.
One downside, which I had read before I began, is that it is not super robust and scuffs easily, which did not take long to happen. Still, ever so important aesthetics aside on a 16 year old netbook, at least it wasn't gross anymore.

Solution #3: Vinyl Wrap
This one is my clear favorite, and also requires a pre-pass with a solvent to clean it up.
Continuing with the car theme I noticed that where some people used Plasti Dip for their laptop repairs, others made custom vinyl skins, typically using VViViD brand, which is what I used.

It is substantially easier to (re)apply and remove, more robust, looks nicer, and doesn't involve many rounds of breathing paint fumes. Here is a good video tutorial for making a custom laptop skin with vinyl. It's similar to applying a bumper sticker: Work slowly and smooth out bubbles as you go. When you reach the ends a hair dryer on the highest setting can help tighten the edges (don't burn yourself, set the house on fire, etc.), then trim the excess.
Be careful! And have fun.
Member discussion